How to Troubleshoot Common Mould Temperature Controller Issues
A Mould Temperature Controller can make or break a smooth production run. When a Mold Temperature Controller Machine fails, downtime increases and product quality drops. Quick action keeps workers safe and protects equipment. In 2021, manufacturing saw 137,000 injuries and 383 deaths, showing the high cost of slow fixes. Fast troubleshooting with an Intelligent Temperature Controller or Mold Temperature Machine stops problems before they grow. Strict quality checks catch issues early, so teams avoid waste and safety hazards.
A fast response saves money, reduces risk, and keeps molds running at the right temperature.
Key Takeaways
- Always follow safety steps like powering down and lockout procedures before working on the controller to prevent accidents.
- Regularly check power connections, fluid levels, temperature readings, and alarm signals to catch problems early and keep the machine running smoothly.
- Fix common issues such as temperature instability, pump noise, leaks, electrical faults, and sensor errors quickly to avoid downtime and product defects.
- Decide wisely between repairing or replacing worn parts by tracking repairs and considering cost and reliability.
- Maintain the controller with daily inspections, scheduled cleanings, and staff training to extend machine life and improve safety.
Mould Temperature Controller Safety Precautions
Power Down and Lockout Procedures
Before anyone works on a Mould Temperature Controller, they should always power down the machine. Lockout and tagout (LOTO) procedures keep everyone safe. These steps stop the machine from turning on by accident. In many industries, skipping lockout steps has led to serious injuries and even deaths. A study in Quebec sawmills found that workers often missed important lockout steps. Sometimes, they did not use lockout at all. This put them in danger. The study showed that proper lockout is key to controlling hazardous energy and preventing accidents.
Tip: Always follow every step in the lockout process. Never skip or rush through it.
- LOTO procedures prevent machines from starting up during maintenance.
- They protect workers from severe injuries like amputations.
- LOTO controls all energy sources, making the area safe.
- These steps also help keep products safe from contamination.
- Following LOTO supports safety rules and reduces risk.
Personal Protective Equipment Requirements
Workers should wear the right personal protective equipment (PPE) when handling a Mould Temperature Controller. PPE keeps workers safe from burns, electrical shocks, and chemical splashes. Common PPE includes safety glasses, gloves, and heat-resistant clothing. Some jobs may need face shields or rubber boots. Each worker should check their gear before starting work. Damaged or missing PPE can put someone at risk.
Identifying Potential Hazards
Every workplace has hazards. When working with a Mould Temperature Controller, workers should look for hot surfaces, leaking fluids, and exposed wires. They should also watch for slippery floors and loud noises. Noticing these dangers early helps prevent accidents. Workers should report any hazard right away. Quick action keeps everyone safe and the equipment running smoothly.
Mould Temperature Controller Quick Diagnostic Checklist
Checking Power Supply and Connections
A quick check of the power supply and connections can solve many problems before they get worse. Loose wires or faulty plugs often cause machines to stop or work poorly. Regular checks help keep everything running smoothly. Here are some important points to remember:
- Faulty controllers can lead to uneven product quality, longer cycle times, and higher energy bills.
- Temperature changes and electrical issues often come from loose connections.
- About 60% of repairs are simple, like tightening wires or cleaning parts.
- Wires and sensors can get damaged or corroded, so regular inspections matter.
- Preventive maintenance and constant monitoring help the machine last longer and work better.
Tip: Always turn off the power before checking any wires or plugs. Safety comes first!
Inspecting Fluid Levels and Flow
Fluid levels and flow rates play a big role in how well a Mould Temperature Controller works. If the fluid is too low or the flow is uneven, the machine may not keep the right temperature. Workers can use simple checks and tools to spot problems early. Experts use special methods to measure how much the fluid level changes and how steady the flow stays. These methods help find small problems before they become big ones. Tools and software can also help check if the fluid moves as it should.
- Variation analysis helps measure how much fluid levels and flow change.
- Agreement analysis checks if different tests give the same results.
- Accuracy analysis shows how well the checks find real problems.
- Research shows that these methods help spot leaks or blockages early.
- Online tools make it easy to check and compare fluid data.
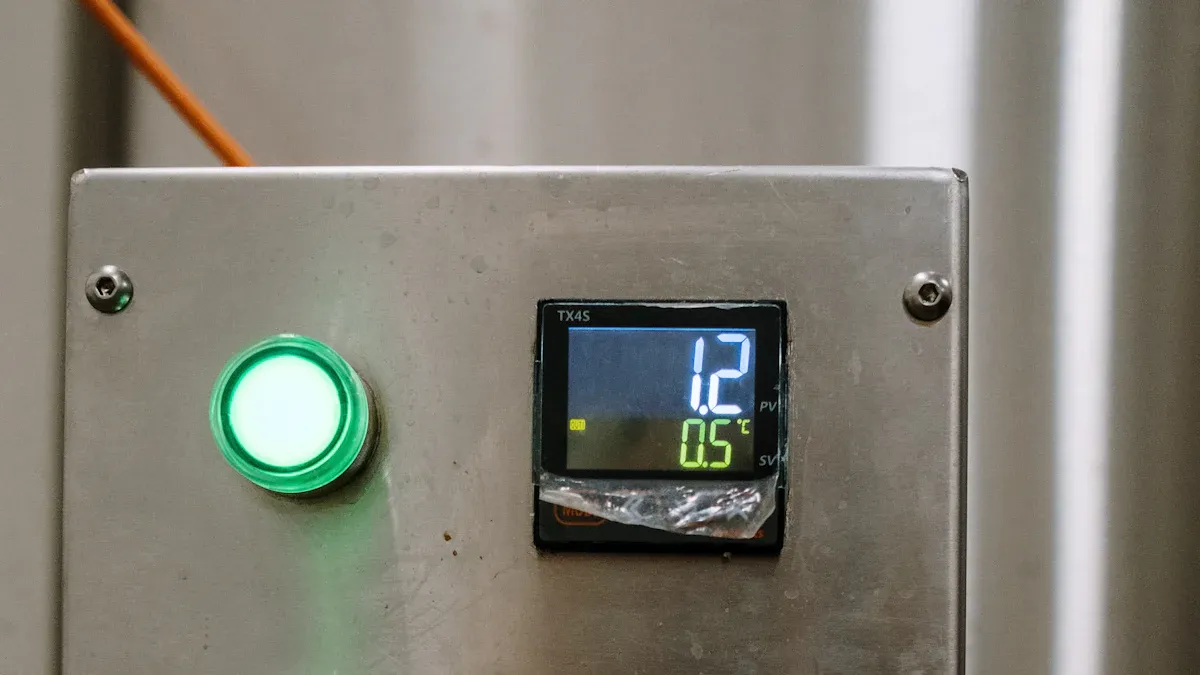
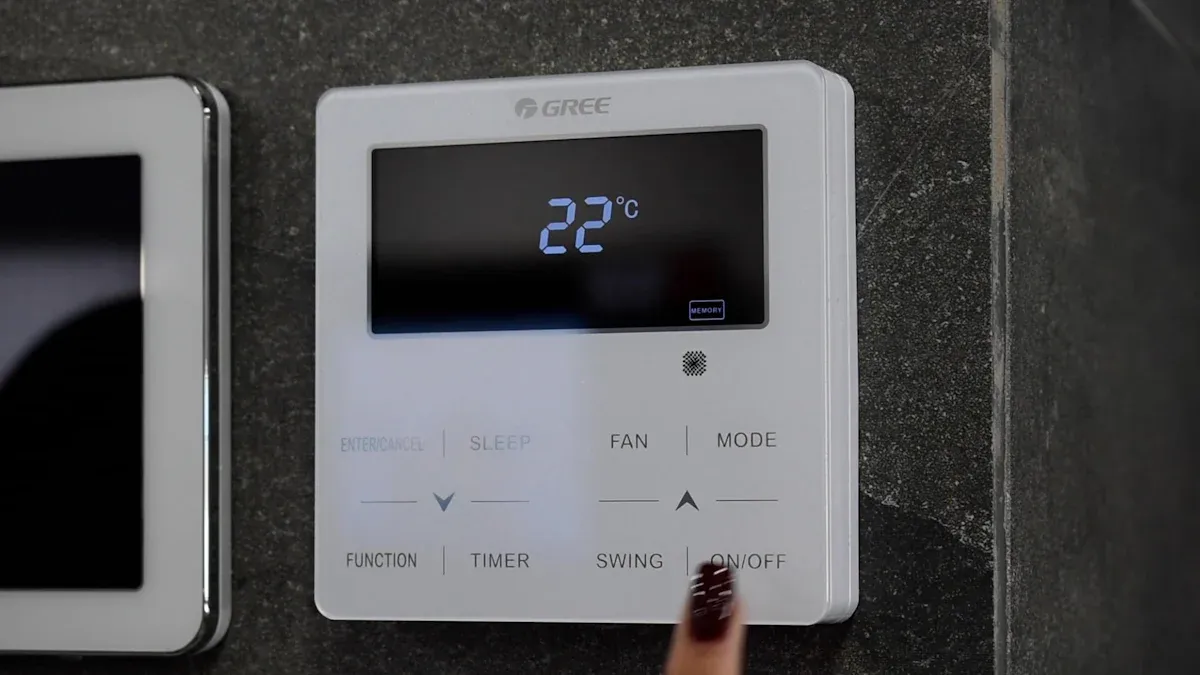
Verifying Temperature Readings
Checking temperature readings is a must for anyone using a Mould Temperature Controller. Studies show that temperature can change a lot inside a mold, especially during heating. If the readings are off, the machine may not heat or cool the mold the right way. This can lead to uneven parts or defects. Tests comparing different control methods prove that checking and adjusting temperature readings helps keep the process steady. When workers verify the numbers, they can catch problems like thermal delays or local hot spots. This step keeps the mold at the right temperature and helps make better products.
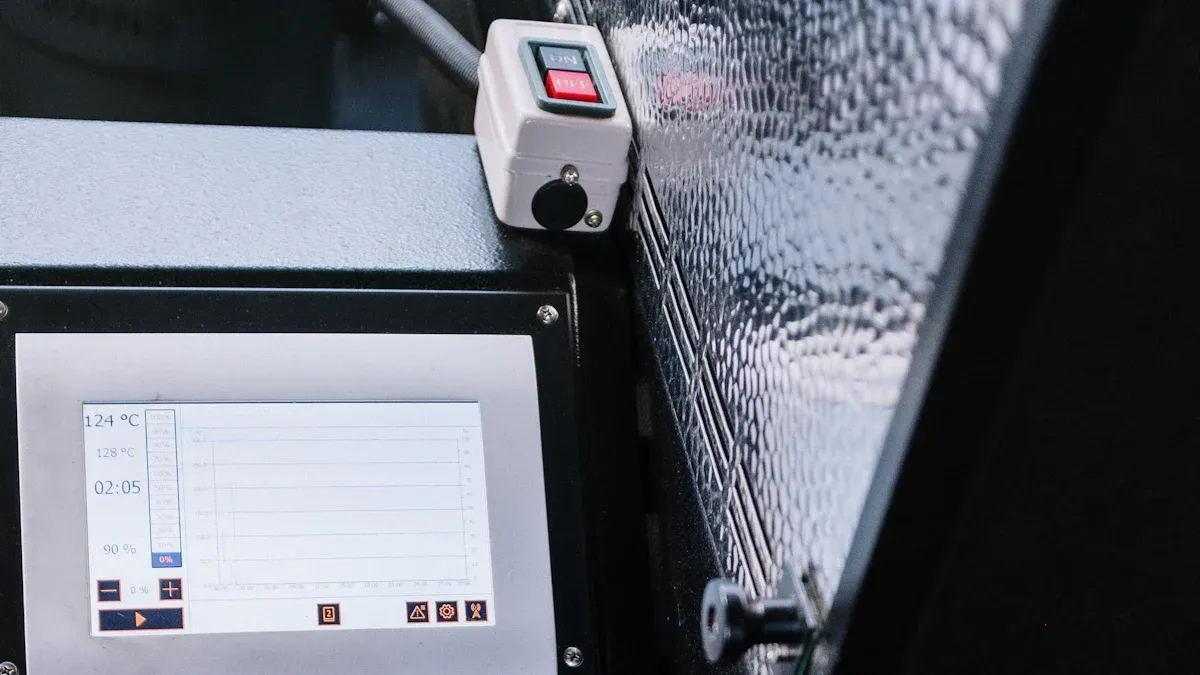
Reviewing Alarm Indicators and Error Codes
Alarm indicators and error codes help workers spot problems fast. Most Mould Temperature Controller machines have lights, buzzers, or digital displays that show when something goes wrong. These alerts can point to issues like overheating, low fluid, or sensor faults. Workers should always pay attention to these signals. Ignoring them can lead to bigger problems or even machine damage.
A good habit is to check the control panel at the start of every shift. If an alarm light flashes or a code appears, workers should look up what it means. Most machines come with a manual that lists common error codes. Some companies also post quick-reference charts near the equipment. Here is a simple example of what workers might see:
| Alarm Indicator | Possible Cause | Suggested Action |
|---|---|---|
| Red Light | Overheating | Check cooling system |
| Yellow Light | Low Fluid | Refill tank |
| E01 | Sensor Error | Inspect sensor wiring |
| E02 | Pump Failure | Check pump connections |
Tip: Keep the manual close by. It saves time when a new error code pops up.
Workers should not guess what an error code means. If the manual is missing, they can ask a supervisor or call the service team. Some Mould Temperature Controller models even have a help button that explains codes right on the screen. Quick action keeps the machine safe and helps avoid downtime.
When a new alarm sounds, workers should write down the code and what they did to fix it. This record helps the next shift and makes it easier to spot repeat problems. Staying alert to alarms and codes keeps production running smoothly.
Troubleshooting Common Mould Temperature Controller Issues
Resolving Temperature Instability
Temperature instability can cause big problems in molding. When the temperature changes too much, the final product may have rough surfaces, warping, or even cracks. Sometimes, the parts do not fit together because they shrink in different ways. This makes the whole process more expensive and wastes time.
Industry guides show that keeping the mold temperature steady is the best way to avoid these problems. They explain that uneven temperature leads to defects and higher costs. To fix temperature swings, workers can check the controller settings and make sure the sensors work well. Sometimes, the heating or cooling system needs cleaning or repair.
Many factories use new methods to keep the temperature stable. Some use hot fluid heating, electric heating, or even induction heating for fast results. Others use gas-assisted systems to control the temperature during different stages. For example, they keep the mold hot when filling it, then cool it down quickly. This helps the plastic flow better and reduces pressure. It also saves energy and shortens the cycle time.
Engineers often use computer models to design better cooling channels inside the mold. These channels help spread the heat evenly. Studies show that special cooling channels, like conformal cooling channels, work better than simple round ones. They use tools like finite element analysis to test and improve the design. This makes the mold last longer and keeps the product quality high.
Tip: If the temperature keeps changing, check the cooling channels for blockages and make sure the sensors are clean and working.
Addressing Pump Failure or Noisy Operation
A noisy or broken pump can stop the whole process. Pumps move the heating or cooling fluid through the system. If the pump fails, the Mould Temperature Controller cannot keep the right temperature.
Here are some signs of pump trouble:
- Loud or strange noises
- Fluid not moving or moving too slowly
- The machine gets too hot or too cold
To fix pump problems, workers should:
- Turn off the power and follow safety steps.
- Check for leaks or blockages in the pipes.
- Look for loose or worn parts in the pump.
- Clean the pump and remove any dirt or debris.
- Listen for grinding or rattling sounds, which may mean the pump needs repair or replacement.
If the pump still does not work, it may need a new motor or seals. Sometimes, the fluid is too thick or dirty, which can also cause noise. Using the right fluid and changing it on schedule helps the pump last longer.
Note: Always use the correct type of fluid for the pump. The wrong fluid can damage the system and cause more noise.
Fixing Leaks and Fluid Loss
Leaks can cause big problems in a temperature control system. When fluid leaks out, the system cannot heat or cool the mold properly. This can lead to poor product quality and even damage the equipment.
Common places to find leaks:
- Pipe joints and connections
- Pump seals
- Hoses and fittings
- The fluid tank
To fix leaks, workers should:
- Inspect all hoses and connections for wet spots or drips
- Tighten loose fittings with the right tools
- Replace cracked or worn hoses
- Check the pump seals and replace them if needed
- Refill the fluid to the correct level after fixing leaks
A simple table can help track leak checks:
| Area Checked | Leak Found? | Action Taken |
|---|---|---|
| Pipe Joints | Yes/No | Tightened/Replaced |
| Pump Seals | Yes/No | Replaced |
| Hoses | Yes/No | Replaced |
| Fluid Tank | Yes/No | Repaired |
Callout: Never ignore a small leak. Even a slow drip can cause big problems over time.
Regular checks and quick repairs keep the system running well. This helps avoid downtime and keeps the mold at the right temperature.
Handling Electrical Faults
Electrical faults can stop a Mould Temperature Controller from working. These faults often show up as alarms, flashing lights, or error codes. Sometimes, the machine shuts down to keep everyone safe. When this happens, workers need to act fast.
Many controllers use sensors to watch pressure, flow, and temperature. If something goes wrong, the system can shut down before damage happens. Real-time alarms and data logs help workers spot problems early. For example, if a wire comes loose or a sensor fails, the controller might show a “no charge” or “position error” alarm. These alarms point to issues like encoder failure or a problem with the servo drive voltage.
To fix electrical faults, workers should follow these steps:
- Turn off the power and follow all safety rules.
- Check the power supply voltage with a multimeter.
- Inspect wires and cables for damage or loose connections.
- Look at the grounding and shielding. Good grounding stops electrical noise.
- Test sensors and outputs. Use a multimeter or an oscilloscope if needed.
- Replace any damaged wires or connectors.
- Use shielded, industrial-grade cables to prevent future problems.
Tip: Good cable management keeps wires safe from wear and stops interference.
A table can help track what workers check:
| Step | Checked? | Action Needed |
|---|---|---|
| Power Supply Voltage | Yes/No | Adjust/Repair |
| Wiring Integrity | Yes/No | Replace/Tighten |
| Grounding/Shielding | Yes/No | Improve/Repair |
| Sensor Outputs | Yes/No | Replace/Test |
When workers keep the electrical system in good shape, the Mould Temperature Controller runs better and lasts longer.
Correcting Sensor Errors and Calibration Problems
Sensors help the controller keep the right temperature. If a sensor gives the wrong reading, the mold may get too hot or too cold. This can ruin the product and waste time.
Common sensor problems include:
- Faulty or broken sensors
- Loose sensor wires
- Dirty or blocked sensor tips
- Wrong calibration settings
To fix sensor errors, workers should:
- Check all sensor wires for damage or loose ends
- Clean the sensor tips with a soft cloth
- Make sure the sensor sits in the right spot
- Use the controller’s menu to check calibration settings
- Replace any sensor that does not work after cleaning
Calibration keeps the readings correct. Workers should use a known good thermometer to check the sensor. If the readings do not match, they can adjust the calibration in the controller’s settings. Some controllers have a step-by-step guide for this.
Note: Always write down the old calibration settings before making changes. This helps if something goes wrong.
Regular checks and calibration keep the system accurate. When sensors work well, the controller can keep the mold at the right temperature every time.
Repair or Replace Mould Temperature Controller Components
Recognizing Signs of Component Wear
Every machine part wears out over time. Pumps may start to make strange noises. Hoses can become cracked or stiff. Sensors might give odd readings or stop working. Workers often notice leaks, slow fluid flow, or temperature swings. These are all signs that something needs attention. Sometimes, the control panel shows warning lights or error codes. A quick look at the equipment can reveal loose wires, rust, or worn seals. Regular checks help catch these problems early.
Deciding Between Repair and Replacement
When a part fails, workers face a choice. Should they repair it or replace it? Small issues, like a loose wire or a dirty sensor, often need just a quick fix. If a pump or sensor keeps failing, it may be time for a new one. Age matters too. Old parts break more often and can cause other problems. If repairs cost almost as much as a new part, replacement makes more sense. Keeping a log of repairs helps teams spot patterns and make better decisions.
Tip: If the same part breaks again and again, replacement saves time and money in the long run.
Sourcing Quality Replacement Parts
Getting the right parts matters for safety and performance. Many teams look for suppliers with strong quality checks. Some suppliers hold ISO9001 and CE certifications, showing they meet high standards. Others get audited by outside agencies, which adds another layer of trust. A supplier with a Diamond Member status since 2025 stands out as reliable. More than half of buyers return to the same supplier, which shows people trust their products. Suppliers with patents show they work on new ideas and better designs. Verified business licenses prove the company is real. Fast delivery and low minimum order sizes help teams get what they need quickly.
- ISO9001 and CE certifications for quality and safety
- Audited by third-party inspection agencies
- Diamond Member status since 2025
- Over 50% repeat buyer rate
- Holder of 5 patents for innovation
- Verified business licenses
- Fast delivery and low minimum order quantity
Choosing a trusted supplier keeps machines running and reduces downtime.
Preventive Maintenance for Mould Temperature Controller
Regular Inspection and Cleaning Routines
Regular inspection and cleaning keep machines running smoothly. Teams often start with a daily checklist. They look for leaks, loose wires, or any signs of wear. A quick wipe-down removes dust and helps spot problems early. Oil and air filters need cleaning to stop dirt from building up. Workers also check hoses and seals for cracks or leaks. When they clean and inspect every day, they catch small issues before they turn into big repairs.
Tip: A clean machine is easier to inspect and less likely to break down.
Scheduled Maintenance Best Practices
Scheduled maintenance follows a set plan. After each production run, workers do basic cleaning and check for damage. Every month, they inspect all parts, including pins and cooling channels. Once a year, they take time for a deep clean and repair. Some factories use smart systems that watch for signs of trouble and remind teams when it’s time for service. These steps help machines last longer and work better.
A simple maintenance schedule might look like this:
| Frequency | Task |
|---|---|
| Daily | Visual check, clean filters, test safeties |
| Weekly | Inspect hoses, check cylinders, clean air |
| Quarterly | Full checkup, grease parts, test circuits |
| Annual | Deep clean, adjust settings, replace worn |
Following this schedule reduces downtime and keeps production on track.
Training Staff for Early Issue Detection
Training helps workers spot trouble fast. Skilled staff know what to look for and how to fix small problems. They learn to use checklists and follow safety steps. When everyone knows the signs of wear or damage, the team can act quickly. Good training means fewer mistakes and safer work. Many companies hold regular classes or hands-on sessions to keep skills sharp.
Workers who know their machines well can prevent most breakdowns before they start.
Prompt troubleshooting keeps a Mould Temperature Controller running and helps teams avoid costly downtime. Companies like XYZ Manufacturing saw fewer breakdowns and lower costs by fixing small problems early. Research shows that smart sensors and quick alerts can cut unplanned downtime by almost half. Regular checks and good habits make equipment last longer. When teams follow best practices, they get safer workspaces and better products.
- Quick action means less waiting and more production.
- Good maintenance keeps machines reliable every day.
FAQ
What should someone do if the mould temperature controller keeps overheating?
If the controller overheats, they should check for blocked cooling channels or low fluid. Cleaning the system and refilling the fluid often solves the problem. If it still overheats, they should call a technician.
How often should workers check fluid levels in the system?
Workers should check fluid levels every day before starting the machine. Regular checks help prevent leaks and keep the system running smoothly. A daily routine makes it easy to spot problems early.
Why does the pump make loud noises during operation?
A noisy pump usually means air is trapped, fluid is low, or parts are worn out. Workers should inspect for leaks, refill the fluid, and tighten any loose parts. If the noise continues, the pump might need repair.
Can someone use any type of fluid in a mould temperature controller?
No, they should always use the fluid recommended by the manufacturer. The wrong fluid can damage the pump and other parts. Using the right fluid keeps the machine safe and working well.